embedding php in html
1. Introduction
1.1 What Is PHP?
PHP (Hypertext Preprocessor) is a popular open-source scripting language designed primarily for web development. It is executed on the server side, meaning the PHP code runs on the web server before the result is sent to the browser. The output of PHP scripts is usually plain HTML, which allows developers to create dynamic web pages that can change content based on user interactions, database queries, or other conditions.
1.2 Why Embed PHP in HTML?
Embedding PHP in HTML allows developers to combine static design (HTML) with dynamic functionality (PHP). Instead of generating entire pages with PHP code alone, you can insert PHP snippets directly into your HTML structure. This approach makes it easier to:
-
Display dynamic content such as user names, dates, or product lists.
-
Handle user input and display feedback in the same page.
-
Create templates that mix layout and logic seamlessly.
In short, embedding PHP within HTML gives flexibility and control, allowing developers to build interactive and data-driven web pages efficiently.
1.3 Basic Syntax Overview
PHP code is enclosed within special tags inside an HTML file:
Anything inside the <?php ... ?> tags is treated as PHP code, while everything outside is regular HTML. The echo statement is used to output text or HTML to the page. When the page is processed by the server, PHP executes the code and sends only the final HTML to the browser — the PHP code itself remains hidden from users.
2. Setting Up the Environment
Before embedding PHP in HTML, you need a proper environment where PHP can run. Since PHP is a server-side language, it requires a web server (like Apache) and a PHP interpreter to process the code. A local server setup allows you to test your PHP code on your own computer before uploading it to a live website.
2.1 Installing a Local Server (XAMPP, WAMP, MAMP)
To run PHP on your local computer, you can use a local development environment such as:
-
XAMPP – Works on Windows, macOS, and Linux.
-
WAMP – Designed mainly for Windows users.
-
MAMP – Great option for macOS users.
These tools include everything you need:
-
Apache – The web server that serves your web pages.
-
PHP – The scripting engine that processes PHP code.
-
MySQL – A database system often used with PHP.
Steps to install (example: XAMPP):
-
Download XAMPP from https://www.apachefriends.org.
-
Run the installer and follow the setup instructions.
-
Start Apache and MySQL from the XAMPP control panel.
-
Open your browser and type
http://localhost/to check if it’s running.
2.2 Configuring PHP and Apache
Once installed, your server environment should work out of the box. However, you can make adjustments if needed:
-
The PHP configuration file (
php.ini) controls settings like upload limits and error reporting. -
The Apache configuration file (
httpd.conf) handles how the web server runs.
For most beginners, the default configuration is fine. Just make sure the Apache server is running before you try to view your PHP pages.
2.3 Creating Your First .php File
Now that your environment is ready, you can create your first PHP file.
-
Open a text editor (like VS Code, Sublime Text, or Notepad++).
-
Write this simple code:
-
Save the file as
index.phpin thehtdocs(XAMPP) orwww(WAMP/MAMP) folder. -
Open your browser and go to:
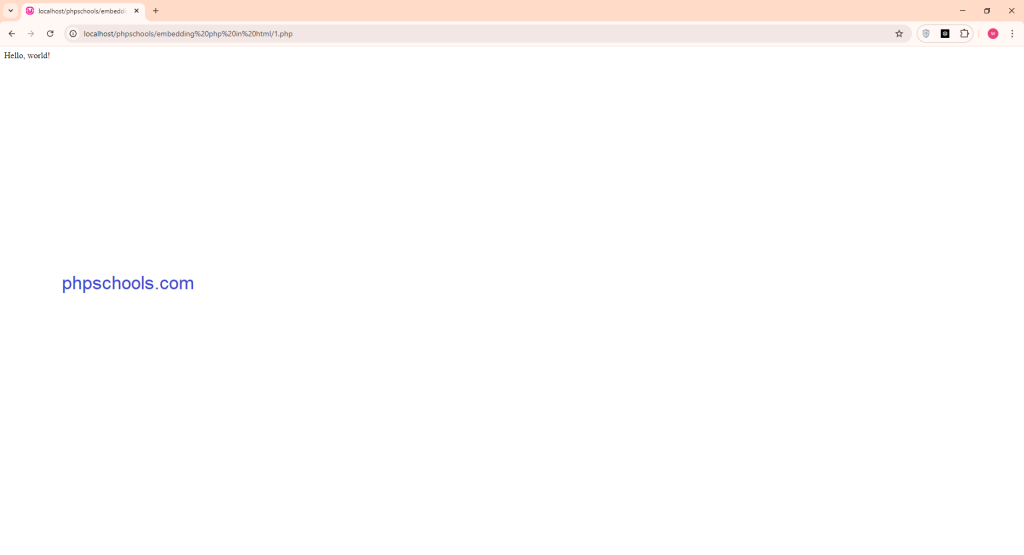
You should see your web page displaying the HTML text and the PHP output together — confirming that PHP and Apache are working correctly.
3. Embedding PHP in HTML
Embedding PHP in HTML is one of the most common and powerful ways to create dynamic web pages. It allows developers to insert PHP code directly inside an HTML document, making it easy to combine static structure (HTML) with dynamic functionality (PHP). When the page is processed by the server, the PHP code is executed first, and the resulting output is sent to the browser as pure HTML.
3.1 Using PHP Tags (<?php ... ?>)
PHP code is enclosed within special tags that tell the web server where the PHP script begins and ends.
The standard opening and closing tags are:
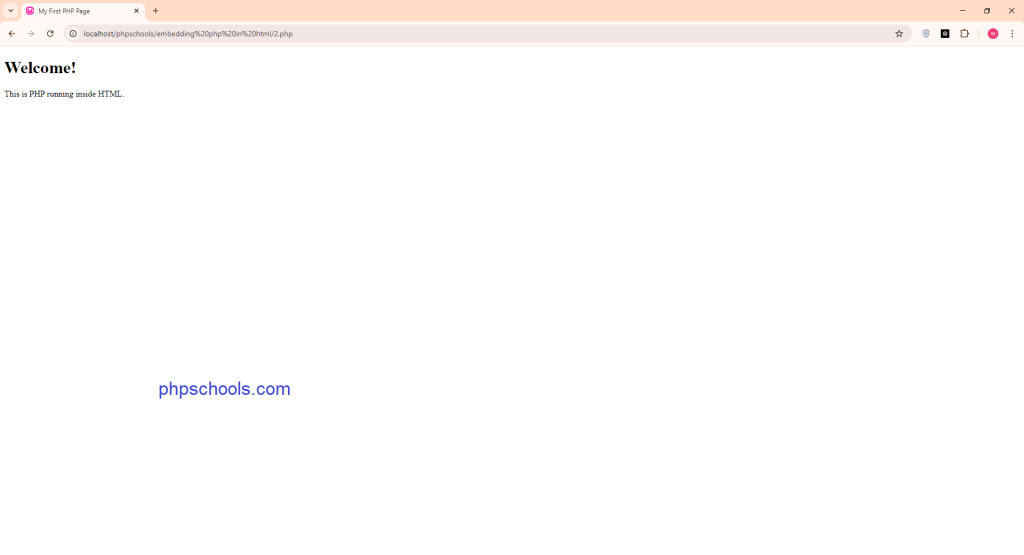
Any PHP code must be written inside these tags. Everything outside of them is treated as normal HTML. For example:
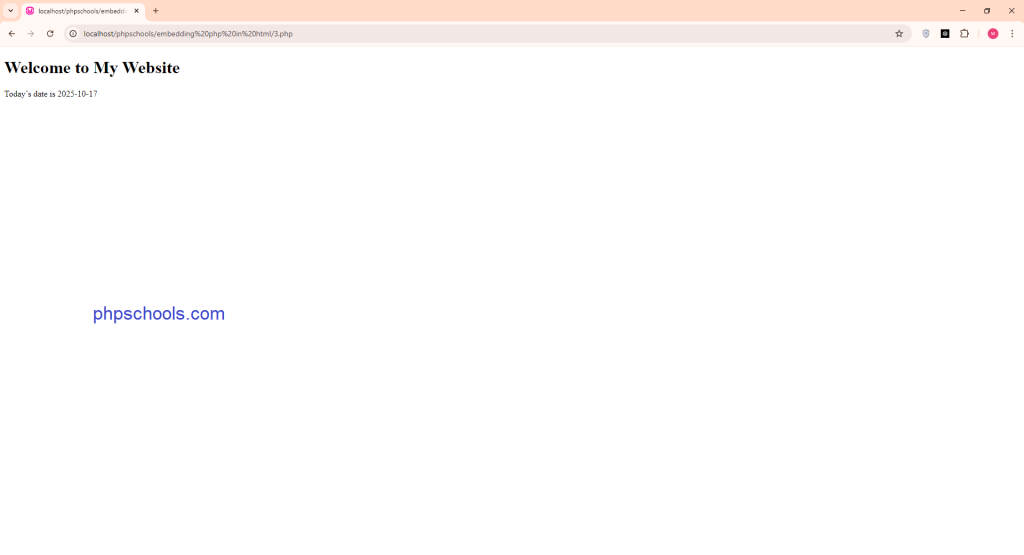
In this example, the HTML defines the structure, and the PHP tag inserts a dynamic date each time the page loads.
3.2 Short Tags and Echo Statements
PHP also allows short echo tags, which provide a quick way to output content. Instead of writing <?php echo ... ?>, you can use:
This is equivalent to:
Short tags make the code cleaner and are often used inside HTML templates. However, in older PHP configurations, short tags might be disabled, so it’s best to use the full <?php ... ?> syntax when working on multiple environments.
3.3 Mixing PHP and HTML Content
One of PHP’s biggest strengths is how easily it integrates with HTML. You can open and close PHP tags multiple times within the same file to switch between static and dynamic sections.
Example:
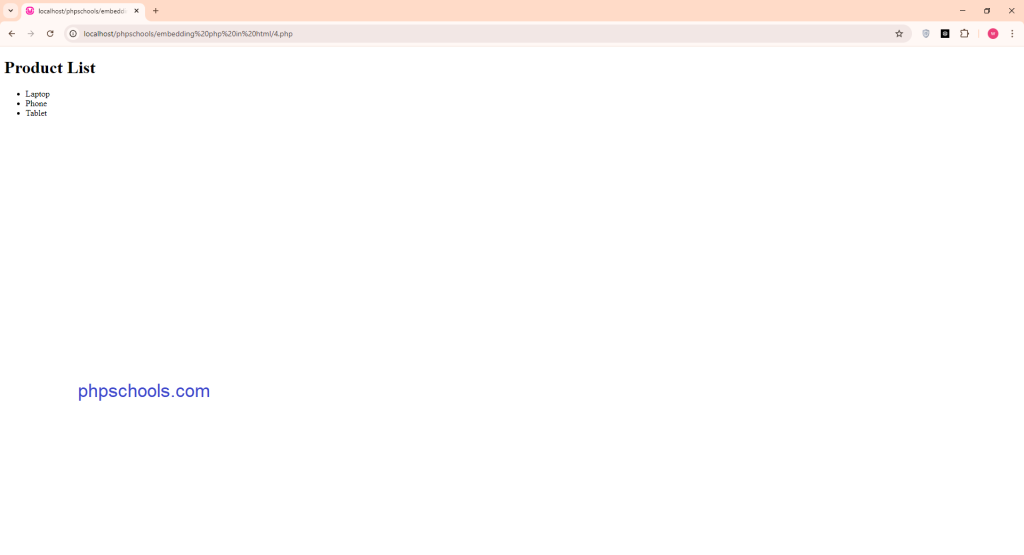
Here, PHP dynamically generates the list items while the rest of the page remains static HTML. This technique is used in templates, dashboards, and content management systems (CMS).
3.4 Commenting in PHP Code
Comments help explain your code and make it easier to maintain. PHP supports three types of comments:
Comments are ignored by the PHP interpreter but are valuable for documenting logic, clarifying sections of code, and improving readability—especially in mixed PHP and HTML files.
4. Working with Variables and Output
When embedding PHP in HTML, you’ll often need to store, process, and display data dynamically. This is where variables and output statements come in. Variables allow you to hold and manipulate data, while output functions let you display that data inside your HTML content.
4.1 Declaring Variables in PHP
In PHP, variables are used to store data such as text, numbers, or arrays. A variable always starts with a dollar sign ($) followed by its name.
Example:
Rules for PHP variables:
-
Must start with a
$symbol. -
The name must begin with a letter or underscore (
_), not a number. -
Variable names are case-sensitive (
$Nameand$nameare different). -
Values can be changed or reassigned at any time.
Variables help make your pages dynamic — for instance, you can show user data, pull database results, or customize messages.
4.2 Printing Text and HTML with PHP
Once you have data stored in variables, you can output it to the browser using either the echo or print statement.
Both display content, but echo is slightly faster and more common.
Example using echo:
Example combining PHP output with HTML:
When the page is loaded, the PHP statements run on the server, and only the resulting HTML is sent to the browser.
4.3 Embedding Variables in HTML Elements
You can directly embed PHP variables inside HTML to display dynamic content. This is especially useful when showing user information, messages, or database results.
Example 1: Simple embedding
Example 2: Embedding inside HTML attributes
$imagePath = "images/profile.jpg";
<img src="<?php echo $imagePath; ?>" alt="Profile Picture">
profile.jpg inside that folder.
In both examples, PHP variables are seamlessly mixed into HTML, allowing you to modify content without changing the static structure of the page.
5. Conditional Statements and Loops in HTML
When building dynamic websites with PHP embedded in HTML, it’s often necessary to control what content is shown or repeated based on certain conditions. Conditional statements and loops allow you to make decisions and automate repetitive tasks within your HTML structure.
These programming features are what make PHP powerful — they enable your web pages to react to data, user input, and other factors dynamically.
5.1 Using if, else, and elseif Blocks
The if statement is used to execute code only when a specific condition is true. You can also add else and elseif to handle multiple possible outcomes.
Basic syntax:
Example in HTML:
if ($hour < 12) {
echo “<h2>Good morning!</h2>”;
} elseif ($hour < 18) {
echo “<h2>Good afternoon!</h2>”;
} else {
echo “<h2>Good evening!</h2>”;
}
</body>
</html>
This script changes the greeting based on the current time of day. PHP decides what to display before sending the final HTML to the browser.
5.2 Using for, foreach, and while Loops
Loops allow you to repeat code automatically, which is especially useful for generating lists, tables, or menus.
for Loop
Used when you know how many times you want to repeat an action.
This creates five list items automatically.
foreach Loop
Ideal for looping through arrays.
The foreach loop goes through each element in the array and outputs it inside the HTML.
while Loop
Repeats code as long as a condition remains true.
5.3 Dynamically Generating HTML Content
By combining conditional statements and loops, you can generate entire sections of HTML dynamically. This is commonly used for things like displaying database records, creating navigation menus, or customizing content for logged-in users.
Example:
In this example, PHP checks each product and adds a special note next to “Camera.” The rest of the HTML remains clean and simple, while the logic happens behind the scenes.
6. Embedding PHP in Forms
Forms are one of the most common ways to collect user input on a website — such as names, emails, or messages. When you embed PHP in HTML forms, you can capture that data, process it, and display results dynamically. PHP makes form handling simple and secure, allowing developers to create interactive and responsive web applications.
6.1 Creating HTML Forms
An HTML form is used to collect input from users. It usually includes fields such as text boxes, checkboxes, radio buttons, and submit buttons.
Example of a simple form:
In this example:
-
The
actionattribute tells the browser which PHP file should process the data (here it’ssubmit.php). -
The
methodattribute defines how the data is sent —GETorPOST. -
Each input has a
nameattribute that PHP uses to identify the value later.
6.2 Handling Form Data with PHP ($_GET, $_POST)
When a form is submitted, PHP collects the user’s input using superglobal variables:
-
$_GET– used when the form’s method is GET. Data appears in the URL (e.g.,?username=John). -
$_POST– used when the form’s method is POST. Data is sent invisibly in the request body.
Example (submit.php):
echo “<p>Name: $name</p>”;
echo “<p>Email: $email</p>”;
</body>
</html>
When the user submits the form, PHP retrieves the data and displays it. Using $_POST is preferred for sensitive or long data since it doesn’t show the information in the URL.
6.3 Displaying Submitted Data in HTML
You can embed PHP directly inside HTML to show submitted data dynamically, either on the same page or another one. This helps create user feedback or confirmation pages.
Example: Process form on the same page
if ($_SERVER[“REQUEST_METHOD”] == “POST”) {
$msg = $_POST[“message”];
echo “<h3>Your message:</h3>”;
echo “<p>$msg</p>”;
}
</body>
</html>
Here, PHP checks if the form has been submitted and then displays the user’s message directly below the form — all within the same page.
7. Including External PHP Files
As your PHP project grows, you’ll often need to reuse the same code across multiple pages — for example, a navigation bar, footer, or database connection. Instead of rewriting the same code in every file, PHP allows you to include external files using the include and require statements.
Including external PHP files helps you write cleaner, more organized, and more maintainable code.
7.1 Using include and require
Both include and require allow you to insert the contents of one PHP file into another before the server executes it.
include Statement
The include statement tells PHP to insert another file at the point where the statement appears.
If the file is missing, PHP will show a warning, but the script will continue running.
Example:
When this page loads, PHP automatically adds the content of header.php inside index.php where the include statement is placed.
require Statement
The require statement works the same way as include, but with one key difference:
If the file cannot be found, PHP will show a fatal error and stop executing the script.
Example:
This is useful for critical files like configuration settings or database connections that your application must have to run properly.
7.2 Structuring Your Project for Reusability
Using include and require lets you build a modular PHP project — one that’s easier to manage and update. Here are some common best practices:
-
Separate common sections
Create separate PHP files for reusable parts of your site, such as:-
header.php→ top navigation or banner -
footer.php→ footer and copyright -
menu.php→ navigation links -
config.php→ database connections and global settings
-
-
Keep your main files clean
Instead of writing everything inside one page, your main file should include only structure and logic.
Example: -
Use consistent folder organization
Store reusable PHP files in a dedicated folder, such as/includes/, to keep your project tidy.
Example: -
Easier maintenance
When you need to update something (like your site’s navigation bar), you only change it in one place, and every page using that file will automatically update.
In summary:
The include and require statements are essential for creating modular, reusable, and maintainable PHP projects.
-
Use
includefor non-critical files (like headers or menus). -
Use
requirefor essential files (like configuration or database setup).
This approach helps keep your HTML and PHP organized while reducing code repetition.
8. Common Mistakes and Best Practices
When embedding PHP in HTML, it’s easy to write messy or inefficient code, especially as your project grows. To keep your web pages functional, secure, and easy to maintain, it’s important to follow good coding habits and avoid common pitfalls. This section highlights frequent mistakes developers make and how to prevent them.
8.1 Mixing Too Much Logic in HTML
One of the most common mistakes is placing too much PHP logic inside HTML.
While PHP can be embedded directly in HTML, large blocks of logic (like database queries or complex calculations) should not be mixed with layout code. Doing so makes the file difficult to read, debug, and maintain.
Bad Example:
This example works, but it mixes database logic and HTML layout together, making it hard to update later.
Better Practice:
Separate the logic from the presentation:
// Logic section (data handling)
$conn = new mysqli("localhost", "root", "", "test");
$users = $conn->query("SELECT * FROM users");
<!DOCTYPE html>
<html>
<body>
<h1>Users</h1>
<ul>
foreach ($users as $user):
<li> $user["name"]; - $user["active"] ? "Active" : "Inactive"; </li>
endforeach;
</ul>
</body>
</html>
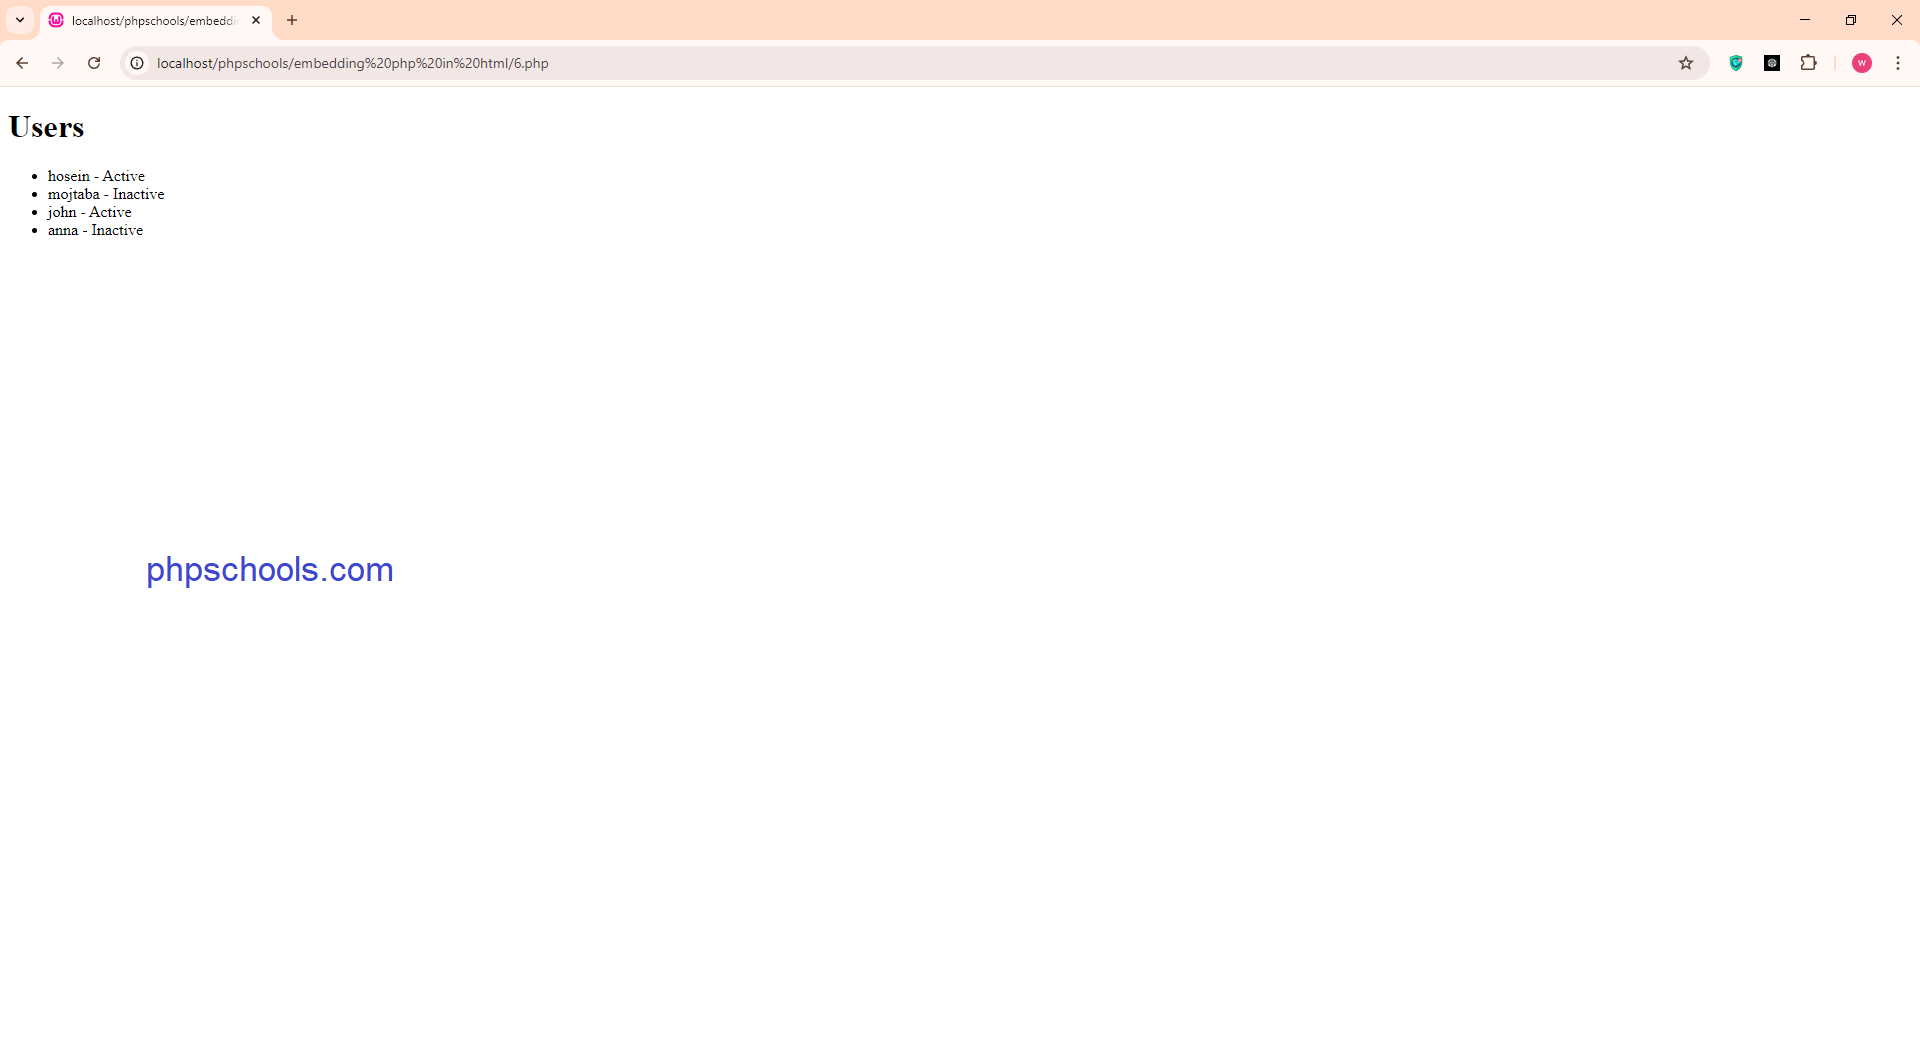
This structure is cleaner, easier to maintain, and more professional.
8.2 Maintaining Readable Code
Readable code is essential for collaboration and long-term maintenance. Even small PHP projects can become confusing without consistent formatting and clear organization.
Best practices for readability:
-
Indent properly: Use consistent indentation (2 or 4 spaces).
-
Name variables clearly: Use descriptive variable names (
$userNameinstead of$u). -
Use comments: Explain complex sections with
//or/* ... */. -
Separate sections: Use blank lines or sections to divide logic, HTML, and functions.
-
Follow consistent style: Use one coding style (for example, always using
<?php echo ... ?>instead of mixing with<?= ... ?>).
Example of readable embedded PHP:
Simple, clear, and well-structured code makes future edits much easier.
8.3 Security Considerations
Security is one of the most important aspects of working with PHP. Since PHP interacts with user input and the server, it’s vulnerable to attacks if not handled carefully.
Common security best practices:
-
Validate and sanitize user input
Never trust data coming from users — always check and clean it before using it. -
Prevent SQL Injection
When working with databases, use prepared statements instead of directly inserting variables into SQL queries. -
Hide sensitive data
Store passwords, API keys, and database credentials in external configuration files, not inside HTML pages. -
Escape output
Usehtmlspecialchars()when outputting user data to prevent malicious scripts (Cross-Site Scripting, or XSS). -
Use HTTPS and sessions securely
Always transmit sensitive data over HTTPS and use secure PHP sessions (session_start()) for login systems.
In summary:
To write efficient and secure PHP embedded in HTML:
-
Keep logic and design separated.
-
Write readable, organized, and well-commented code.
-
Always validate and secure user input.
Following these best practices will make your code more professional, maintainable, and protected against common vulnerabilities.
9. Practical Examples
Now that you understand the concepts of embedding PHP in HTML, let’s look at some real-world examples. These practical exercises show how PHP and HTML work together to create dynamic, data-driven web pages.
9.1 Dynamic Web Page Template
A dynamic web page template allows you to create a consistent layout for your website (like a header, footer, and main content area) while changing only the content for each page.
Example:
When you load index.php, PHP automatically includes the header and footer files, creating a complete, reusable layout.
If you create a new page (like about.php), you can reuse the same template with a different $pageTitle and content — saving time and keeping your design consistent.
9.2 Displaying Database Data Inside HTML
One of PHP’s most common uses is displaying data stored in a database (like a list of products, users, or articles). Let’s see a simple example using MySQL.
Example:
// Check connection
if ($conn->connect_error) {
die(“Connection failed: “ . $conn->connect_error);
}
// Query the products table
$sql = “SELECT name, price FROM products”;
$result = $conn->query($sql);
// Display results
if ($result->num_rows > 0) {
while ($row = $result->fetch_assoc()) {
echo “<li>” . $row[“name”] . ” – $” . $row[“price”] . “</li>”;
}
} else {
echo “<li>No products available.</li>”;
}
$conn->close();
</ul>
</body>
</html>
Here, PHP connects to a MySQL database, retrieves data, and embeds it directly into the HTML list. When the page is loaded, the user sees a clean, formatted list of products — without ever seeing the PHP code behind it.
9.3 Simple PHP Contact Form
A contact form is a classic example of PHP embedded in HTML. It collects input from users and displays a confirmation message after submission.
Example:
if ($_SERVER[“REQUEST_METHOD”] == “POST”) {
$name = htmlspecialchars($_POST[“name”]);
$email = htmlspecialchars($_POST[“email”]);
$message = htmlspecialchars($_POST[“message”]);
echo “<h3>Message Received!</h3>”;
echo “<p><strong>Name:</strong> $name</p>”;
echo “<p><strong>Email:</strong> $email</p>”;
echo “<p><strong>Message:</strong> $message</p>”;
}
</body>
</html>
In this example:
-
The user fills in their name, email, and message.
-
PHP captures the submitted data using
$_POST. -
The data is then displayed back to the user safely with
htmlspecialchars()to prevent code injection.
This same technique can later be expanded to send emails, save messages in a database, or display success/error notifications.
10. Conclusion
After exploring how PHP can be embedded in HTML, it’s important to summarize the key concepts and outline the next steps for continuing your learning journey.
10.1 Recap of Key Concepts
Throughout this guide, we have covered the essential aspects of embedding PHP in HTML:
-
PHP Basics:
-
PHP is a server-side scripting language used to create dynamic web pages.
-
PHP code is embedded inside HTML using
<?php ... ?>tags.
-
-
Variables and Output:
-
Variables store data that can be displayed or manipulated.
-
echoandprintoutput text or HTML dynamically.
-
-
Conditional Statements and Loops:
-
if,else, andelseifcontrol which content appears. -
Loops like
for,foreach, andwhilerepeat HTML sections based on data.
-
-
Forms and User Input:
-
PHP can capture data from HTML forms using
$_GETand$_POST. -
Proper handling ensures dynamic and secure interactions with users.
-
-
Including External Files:
-
includeandrequirehelp reuse code, creating modular and maintainable projects.
-
-
Best Practices:
-
Keep logic separate from presentation.
-
Write readable, organized, and secure code.
-
Always validate and sanitize user input to prevent security risks.
-
-
Practical Examples:
-
Dynamic templates, database-driven pages, and contact forms illustrate real-world usage of PHP embedded in HTML.
-
By combining these techniques, you can create interactive, dynamic, and professional web pages efficiently.
10.2 Next Steps in Learning PHP
To continue improving your PHP skills beyond embedding it in HTML:
-
Explore PHP Functions and Libraries:
-
Learn to write reusable functions, work with arrays, and use built-in PHP functions.
-
-
Work with Databases:
-
Practice connecting to databases (MySQL, MariaDB), running queries, and handling results securely.
-
-
Learn Object-Oriented PHP:
-
Understand classes, objects, inheritance, and encapsulation for more structured code.
-
-
Study PHP Frameworks:
-
Frameworks like Laravel, Symfony, or CodeIgniter help build scalable applications quickly.
-
-
Enhance Security and Validation:
-
Learn advanced techniques to prevent SQL injection, XSS attacks, and secure session handling.
-
-
Build Real Projects:
-
Apply your knowledge by creating blogs, e-commerce sites, dashboards, or portfolio websites.
-